


.svg)


Smart Contract With Clarc - Smarter Ways to Grow Your Business
Clarc’s new Smart Contract functionality is built to remove the friction from contract creation and give you complete flexibility over how you work.
.svg)
Build your desired contract with Clarc's new template - Less Admin, More Control.

Create contracts your way with Clarc.
With Clarc’s Smart Contracts, you can choose from built-in templates or upload your own Word documents, giving you full control over your agreements.
Key information such as client details, project data, fees, and signatures can be automatically filled using smart variables, eliminating repetitive edits and reducing the risk of errors.
This means faster setup, cleaner workflows and more flexibility.
Now, let’s take a look at how it works.
Clarc has always offered a built-in contract template, which many of our users continue to rely on. For those who need more flexibility and advanced formatting, Word documents can now be uploaded directly into Clarc.
Once uploaded, they can be edited, revised, and finalized within the platform, making it easy to manage and send contracts — all in one place.
And don’t worry — if you’ve been using the built-in template, it’s still available as a core feature!
Creating Contract Templates using Word Document
You can upload a Word document directly as a new contract for your project, or set it up in advance as a reusable template through the template settings.
Step 1 - Upload a file
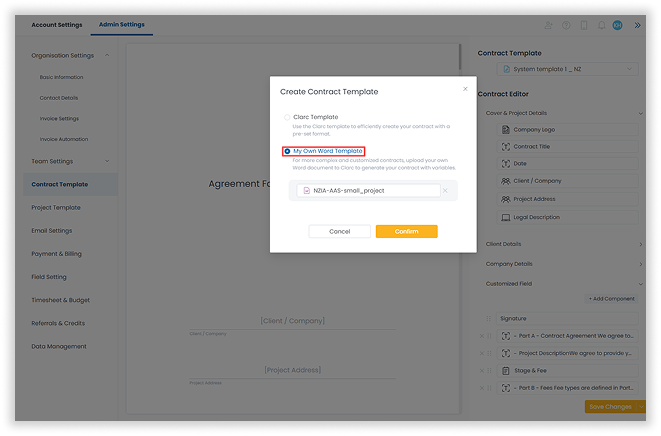
- Head over to Admin Settings - Contract Template
- Select Create Contract Template, Choose My Own Word Template
- Upload word document
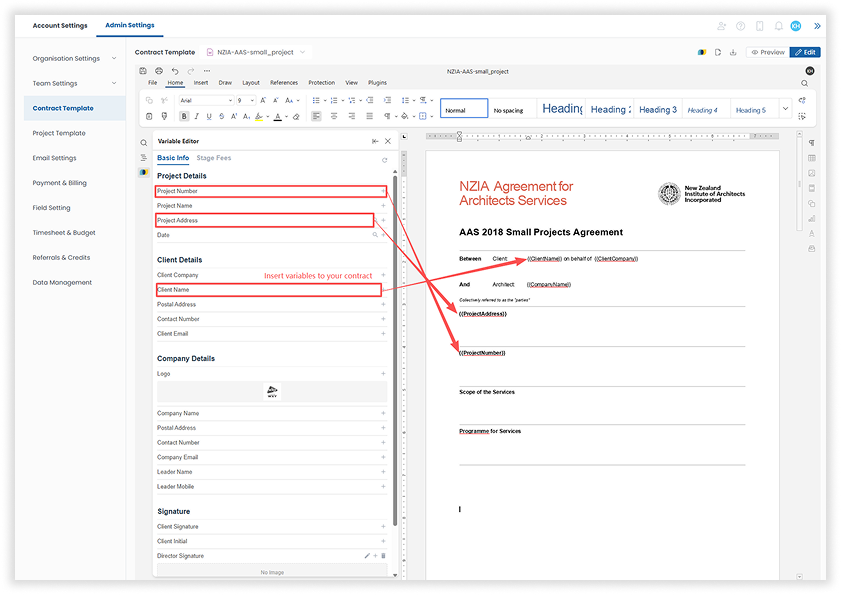
Step 2 - Insert Variables
Variables hold data from your Clarc account, including project numbers, addresses, company information, and client details. These variables are linked to real-time data, so they automatically update whenever information in the system changes.
When added to your contract template, they appear as placeholders, for example: {{Project Number}}.
When a new contract is created, the data from these variables is automatically inserted, ensuring your contracts are always accurate and up to date.
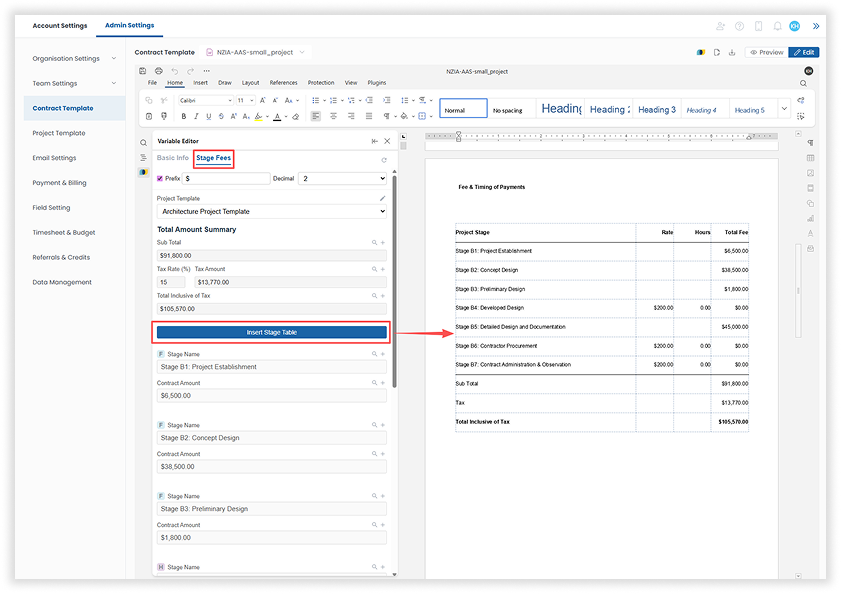
Step 3 - Insert Stage Fees
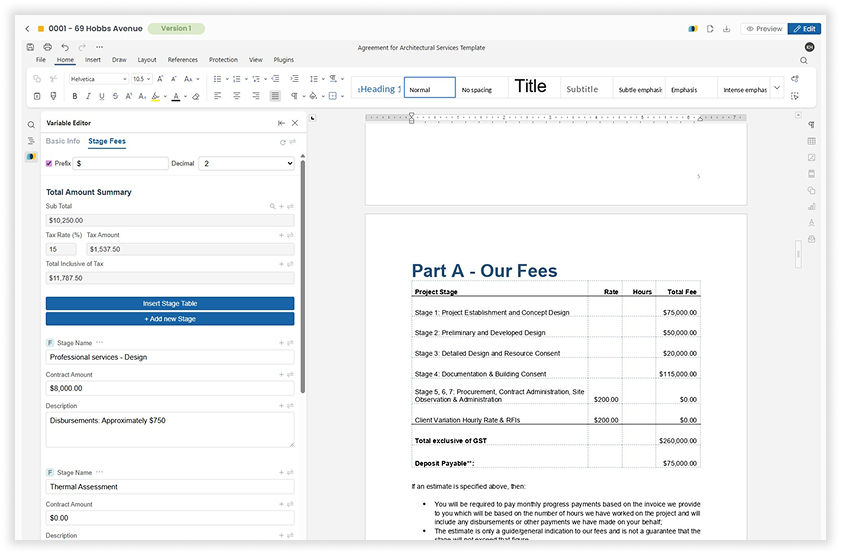
The stage fee is also treated as a variable and is organized in a table format, showing project stages, billing type, stage descriptions, and the fees for each stage.
The table automatically includes a subtotal, tax, and total. In the Contract Template Builder, you can select from your existing project templates if everything is already set up, making it quick and easy.
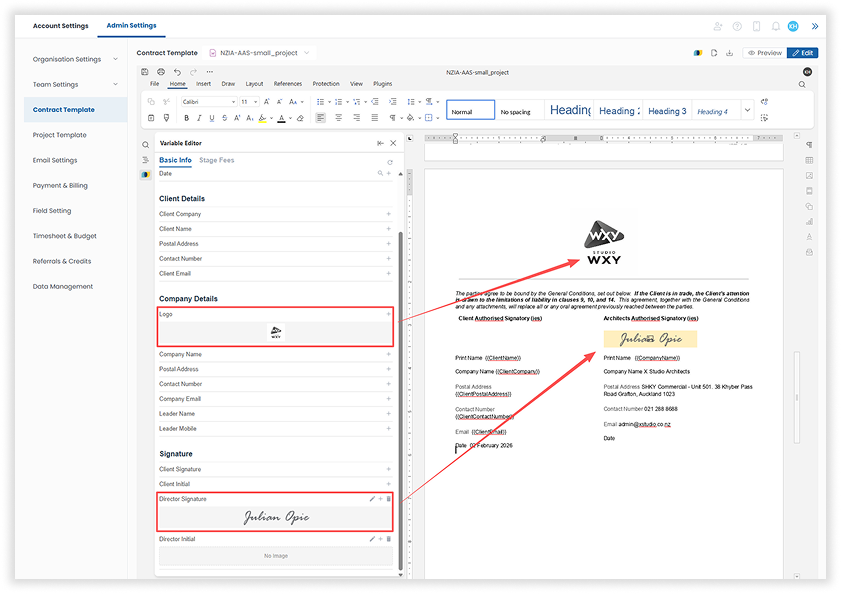
Step 4 - Check your company logo and insert Director’s signature
Your company logo is automatically loaded from the organization settings, and you can adjust its size and formatting directly within the Word interface if needed.
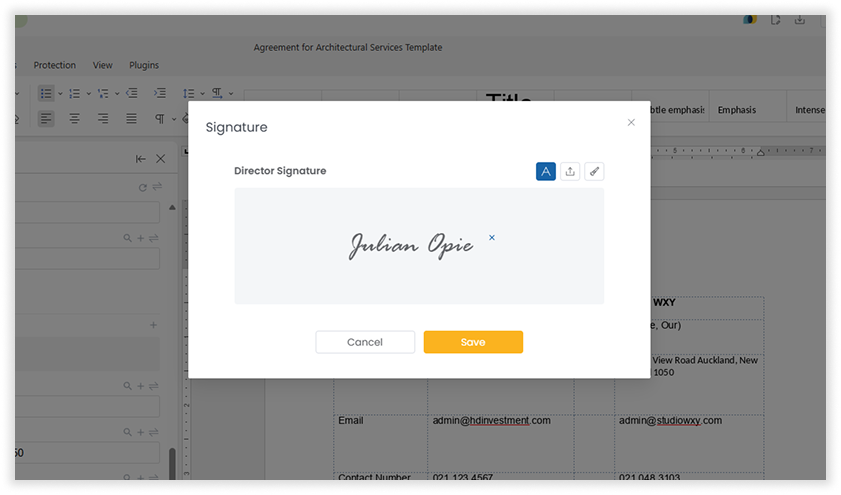
We also recommend adding the director’s signature to your template to save time when creating contracts in the future.
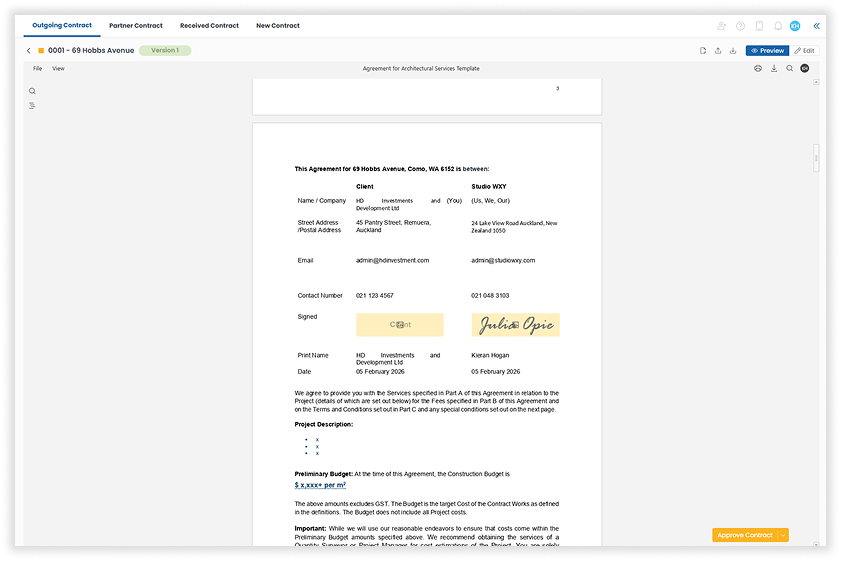
You can preview your contract template to ensure everything is correctly placed and formatted
then you’re ready to go!

Setting up Contract for a new project
It’s highly recommended to set up a contract template if you’re using Word documents, as manual editing can be time-consuming.
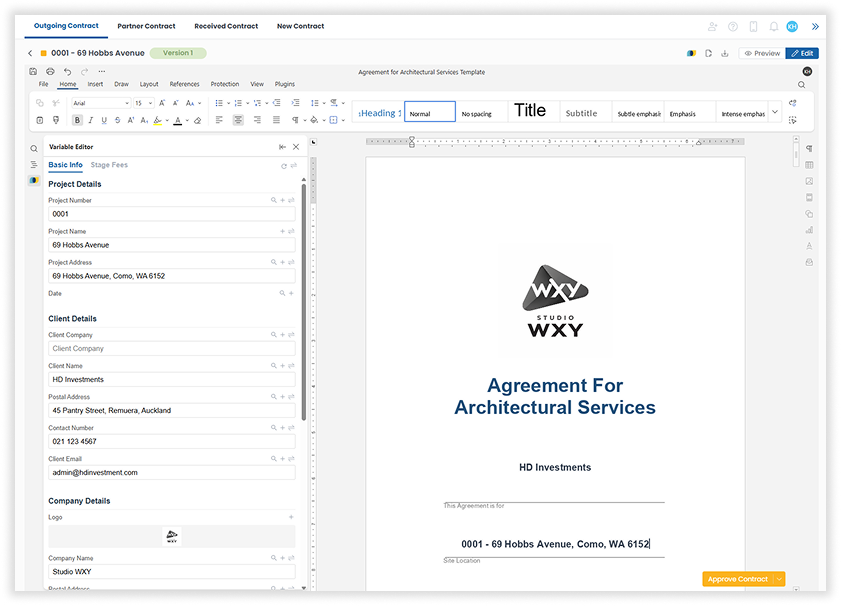
During the editing phase, you can view the contract alongside a variable editor, making it easy to insert and update information quickly.
Inserting & Updating Variables
You can insert variables anywhere within your Word document and adjust the formatting directly using the Word interface.
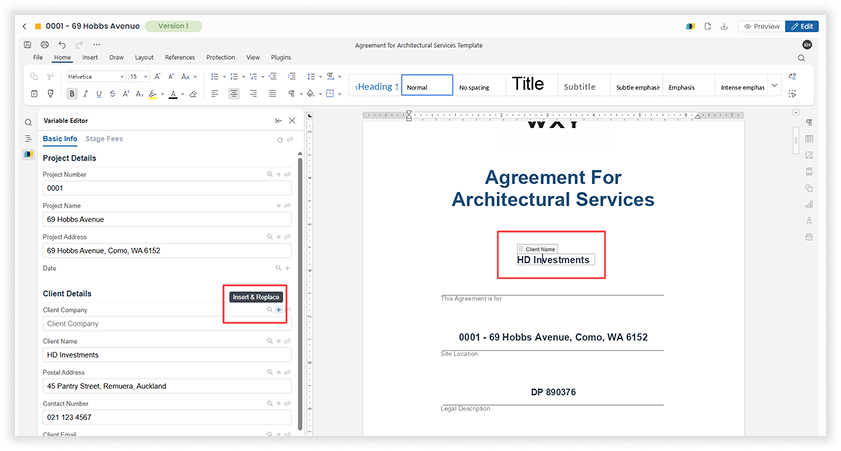
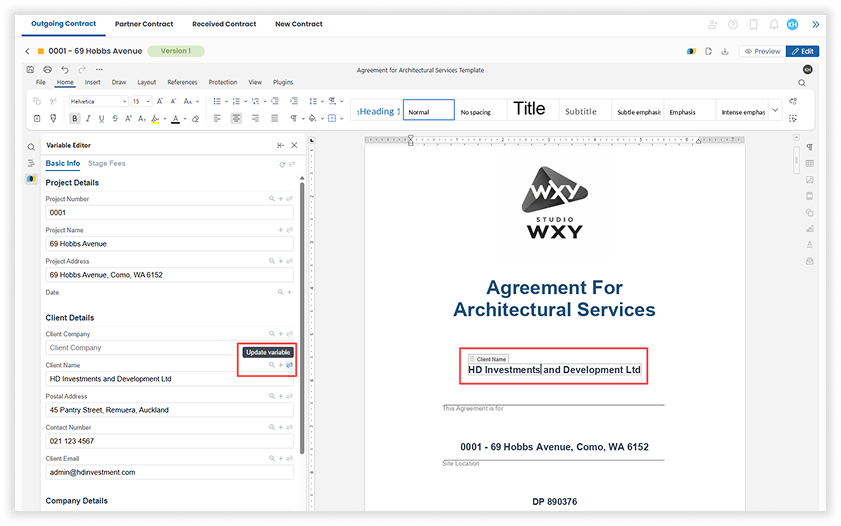
If a variable’s content needs to be updated, it can only be done in the variable editor.
You can update individual variables or refresh all of them at once by clicking Update All at the top of the editor.
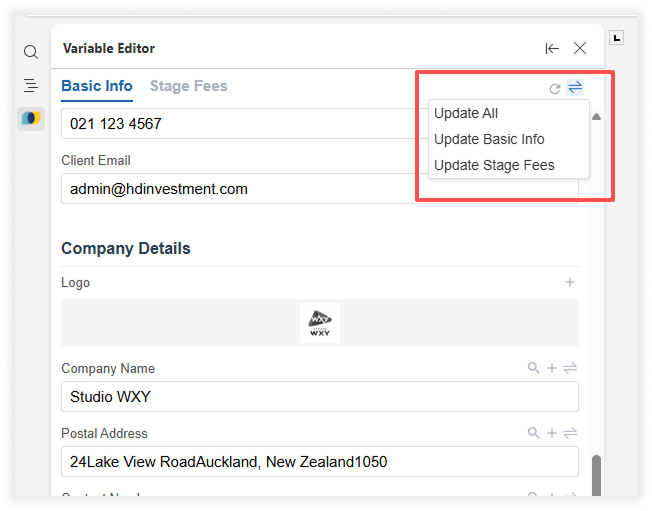
To locate your variable in the contract. Click on the magnifying glass icon.
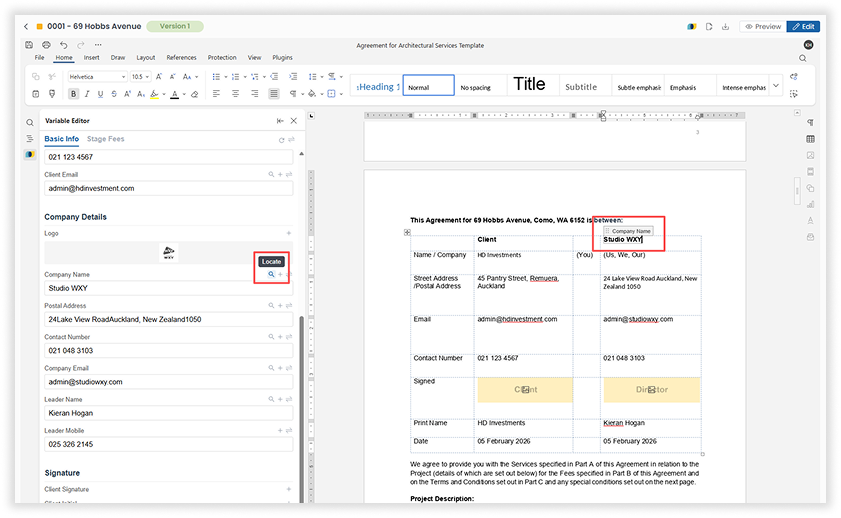
All variables are highlighted with a frame, and a hover tooltip at the top shows what information each variable represents, including the Stage Fee variable.
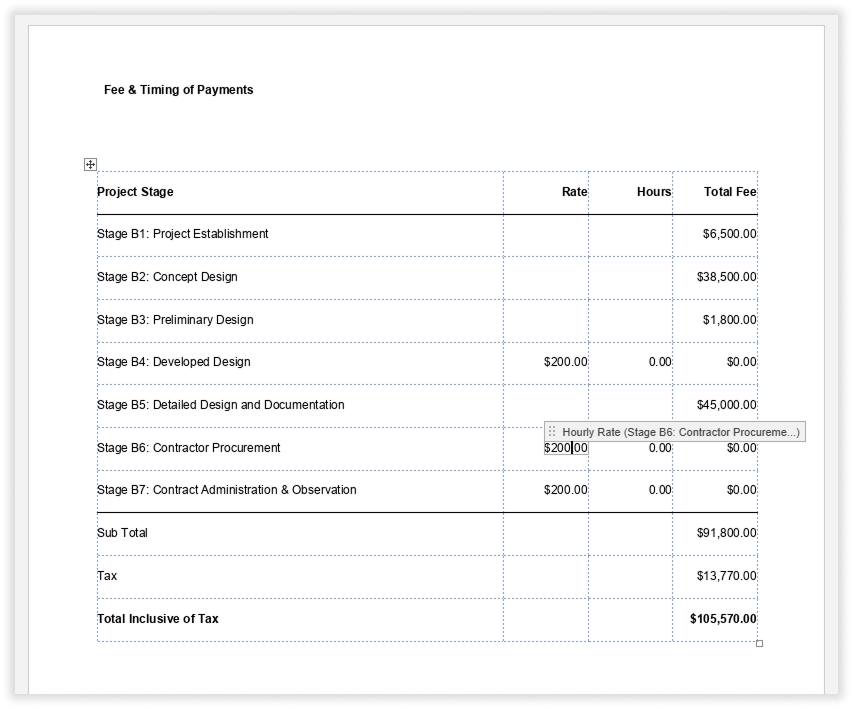
If you haven’t set up a Project Template yet, don’t worry — you can still create new stages for your project contract and edit the fees directly from here.
If the director’s signature hasn’t been preset, it can also be added via the variable editor. This variable lets you either generate a signature automatically or sign manually using a digital pen tool.
You can preview your contract at any time during the editing phase to review content and formatting, and return to editing with just one click.

.png)

Read More
